Hi! First of all, thank you for stopping by. It gives me strength to keep sharing what I like because I know it is all worth the effort. That being said, today, I am going to expand on what I did on Google Maps API part I by adding more features to our map. Last time, our map.js file has the following code:
(function () {
    window.onload = function () {
        var mapDiv = document.getElementById('map');
        var latlng = new google.maps.LatLng(37.09, -95.71);

        var options = {
            center: latlng,
            zoom: 4,
            mapTypeId: google.maps.MapTypeId.ROADMAP
        };
        var map = new google.maps.Map(mapDiv, options);
    };
})();
Controlling The User Interface
- disableDefaultUI – setting this property to true disables the default user interface. This further means the default zoom control and the map type chooser will not be displayed. Even if you disable the default user interface, you can still enable these controls individually. The default value is false. Example:
.
.
var options = {
   center: new google.maps.LatLng(37.09, -95.71),
   zoom : 8,
   mapTypeId : google.maps.MapTypeId.ROADMAP,
   disableDefaultUI : true
   //Alternatively, you can seperately enable or disable:
   //mapTypeControl: true
   //zoom
};
.
.
Before disabling the default user interface, the map looked like this:

After disabling it, you will see something like this:
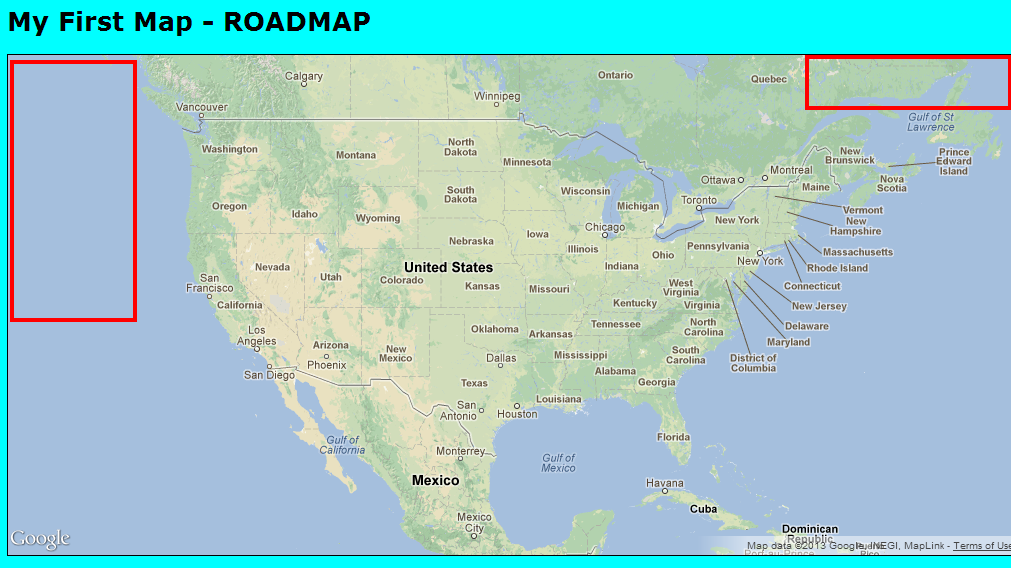
As you can see, the rectangles represent the original position of our default user interfaces.
mapTypeControlOption
In a case where you decide to have mapTypeControl visible, then mapTypeControlOption controls how it will be displayed. It can look different depending on circumstances or your own decisions to place it where you want. One good thing also is that you can define what map types you would like the user to choose from. This property takes an object of type google.maps.MapTypeControlOptions as its value. It has three properties:
- style
- position
- mapTypeIds
As you might have guessed, while using mapTypeControlOptions, you must always remember to set mapTypeControl to true.
Style
This property determines the appearance of the control. The values you can choose from reside in the google.maps.MapTypeControlStyle object. The choices are:
- DEFAULT – the look will vary depending on the window size and maybe other factors. If the map is big enough, you get a horizontal bar displayed, otherwise, a drop-down menu will be shown.
- HORIZONTAL_BAR – this displays the horizontal bar!
- DROPDOWN_MENU – displays a drop-down list to either save space or some other reason!
Code Example:
(function () {
    window.onload = function () {
        var mapDiv = document.getElementById('map');
        var latlng = new google.maps.LatLng(37.09, -95.71);

        var options = {
            center: latlng,
            zoom: 4,
            MapTypeId: google.maps.MapTypeId.ROADMAP,
            mapTypeControl : true,
            mapTypeControlOptions : {
               style : google.maps.MapTypeControlStyle.DROPDOWN_MENU
           }
        };
        var map = new google.maps.Map(mapDiv, options);
    };
})();
Position
As you might have noticed, the default position of this control is in the upper-right corner. You can easily define it to appear somewhere beside the upper-right corner. To do that, you will need to use the google.maps.ControlPosition class. This class has several predefined positions you can choose from: BOTTOM, BOTTOM_LEFT, BOTTOM_RIGHT, LEFT, RIGHT, TOP, TOP_LEFT, TOP_RIGHT.
Code Example: Style: DROPDOWN_MENU, Position: TOP
(function () {
    window.onload = function () {
        var mapDiv = document.getElementById('map');
        var latlng = new google.maps.LatLng(37.09, -95.71);

        var options = {
            center: latlng,
            zoom: 4,
            mapTypeId: google.maps.MapTypeId.ROADMAP,
            mapTypeControl: true,
            mapTypeControlOptions : {
                style: google.maps.MapTypeControlStyle.DROPDOWN_MENU,
                position : google.maps.ControlPosition.TOP
            }
        };
        var map = new google.maps.Map(mapDiv, options);
    };
})();
The outcome is:

mapTypeIds
You use this property to control which map type to display. It takes an array of available MapType controls you want to use. The code below shows how to add it to our map example:
(function () {
    window.onload = function () {
        var mapDiv = document.getElementById('map');
        var latlng = new google.maps.LatLng(37.09, -95.71);

        var options = {
            center: latlng,
            zoom: 4,
            mapTypeId: google.maps.MapTypeId.ROADMAP,
            mapTypeControl: true,
            mapTypeControlOptions : {
                style: google.maps.MapTypeControlStyle.DROPDOWN_MENU,
                position : google.maps.ControlPosition.TOP,
                mapTypeIds :
                    [
                    google.maps.MapTypeId.ROADMAP,
                    google.maps.MapTypeId.SATELLITE
                    ]
            }
        };
        var map = new google.maps.Map(mapDiv, options);
    };
})();
The final map now has a drop-down menu with a list of two MapTypeIds: ROADMAP and SATELLITE. Let us finish this post with a look!

I am going to stop here for today because I don’t want to make this post too long. So, I want to wrap up by saying congratulations for keeping up with me. Next time I will do some work on navigationControl and more! Thanks for stopping by and if you liked this post, please drop me a line and share it online! See you soon. If you have questions, please ask me!

1 thought on “Programming With Google Maps APIs – Part II”