Hello! I am back and I hope you are doing good today. At the end of my fourth Google Maps APIs post, I mentioned in passing that I will be starting with Markers today and that is exactly where I will start. To make things fun, here is what a marker looks like – you have probably seen one if you have used a map before!

There you have it! So a marker is a small image that is positioned at a specific place on a map. Now we can figure out how to add it to our own map. We will start with a basic code for our map.
(function () {
    window.onload = function () {
        var mapDiv = document.getElementById('map');
        var latlng = new google.maps.LatLng(40.7257, -74.0047);

        var options = {
            zoom: 12,
            center: latlng,
            mapTypeId: google.maps.MapTypeId.ROADMAP
        };
        var map = new google.maps.Map(mapDiv, options);

    };
})();
Adding a Marker
You can choose to go with the default look of a marker or create your own. I will use the former in this example. A marker is of type google.maps.Marker object. This object takes one parameter which is of type google.maps.MarkerOptions . MarkerOptions has several properties that you can use to make the marker look and behave different but the basic two are: position and map.
position – this property defines the coordinates to place the marker and takes an argument of type google.maps.LatLng object.
map – the map property is a reference to the map to which you want to add the marker.
Example code for a marker
(function () {
window.onload = function () {
var mapDiv = document.getElementById('map');
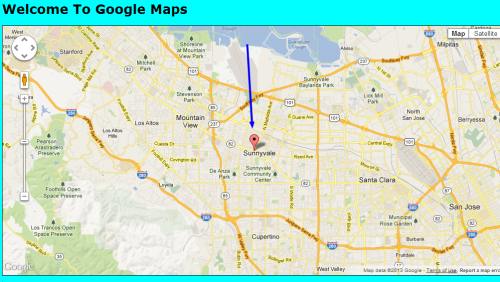
var latlng = new google.maps.LatLng(37.3700, -122.0400);
var options = {
zoom: 12,
center: latlng,
mapTypeId: google.maps.MapTypeId.ROADMAP
};
var map = new google.maps.Map(mapDiv, options);
var marker = new google.maps.Marker({
position : latlng,
map : map
});
};
})();
There you have it. Oh wait, we have not seen it actually on a map yet. Here it is:
Adding a tooltip
We might both agree that adding a tooltip to our marker will make it much better. A tooltip is a yellow box with some text in it that appear when you hover your mouse over a marker. To add it to our marker, we simply use title property of the MarkerOptions object.
. //minimized code here from above
.
.
var map = new google.maps.Map(mapDiv, options);

var marker = new google.maps.Marker({
            position : latlng,
            map : map,
            title: 'Click Me Now'
});
One thing to note is that you are not limited to using the default marker icon. In fact, Google hosts a ton of other icons that you can freely use. In order to use a different icon, you provide a url location to it like this:
var marker = new google.maps.Marker({
             position: latlng,
             map: map,
             title: 'Click Me Please',
             icon : 'http://youricon-location.com'
});
Adding an InfoWindow
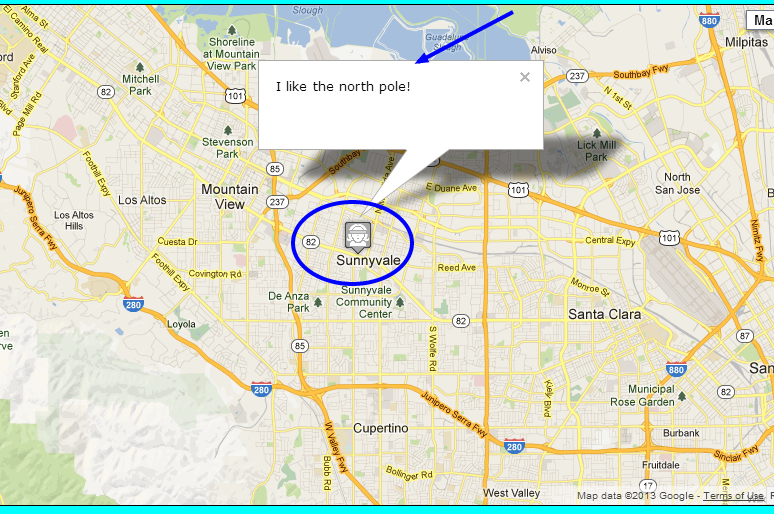
Normally when marking a place on a map, you might want to show more information related to that place. Google Maps APIs provides a way to do so using InfoWindow. It looks like a speech bubble and appears on top of a marker when you click it.
InfoWindow resides in the google.maps namespace. It takes one argument which is an object called InfoWindowOptions. Just like MarkerOptions object, InfoWindowOptions has several properties but the most important one is the content. This property controls what will show inside the info window. It can be plain text, HTML or a reference to HTML node.
Code Example:
. //minimized code
. //save space
.
var map = new google.maps.Map(mapDiv, options);
var marker = new google.maps.Marker({
            position : latlng,
            map : map,
            title: 'Click Me Now'
});
//added a class for styling the window
var infowindow = new google.maps.InfoWindow({
      content : "<div class='infowindow'>You are awesome</div>"
});
.
.
Now that we have created our infowindow, running this code as is … well, won’t work yet. The reason is this: we have to connect the marker with our infowindow. How do we do that? Thanks to Google Maps APIs, we have google.maps.event.addListener() method to the rescue. This method takes three arguments ( the object it is attached to, the event it should listen for and the function (event handler) to call when the event is triggered.
Before I show you the code, it would be clear to mention that the InfoWindow object has a method called open() which takes two arguments – map: this is a reference to the map it will be added to(in case you have more than 1 map) and the second argument is the object that the InfoWindow will attach itself to. In our case, we want to attach it to the marker being clicked!
Now code:
.
.
//added a class for styling the window
var infowindow = new google.maps.InfoWindow({
      content : "<div class='infowindow'>You are awesome</div>"
});

//add event listener
google.maps.event.addListener(marker, 'click', function(){
      infowindow.open(map, marker);
});
.
.
Here is how it looks in action:

That icon is called abduction. You can also see the shadow! Awesome.
More Markers – markersville
The question you might have asked yourself is this: how do I add more than one marker to my map without manually creating them? One thing I have assumed all along is that you are familiar with JavaScript and with that in mind, using a for loop and an array sounds like a good idea!
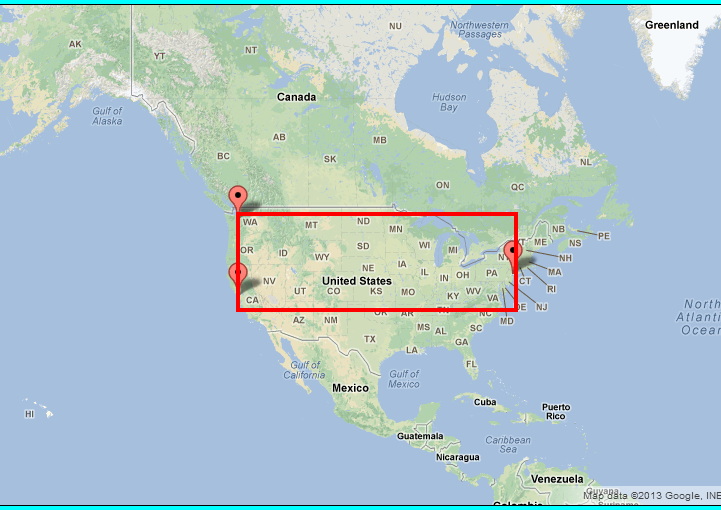
More United States Cities on the Map
I am going to show you the entire piece of code that does several things: (i) add markers (ii) add infowindows and (iii) eliminate duplicate windows. It will make much sense once I explain it.
(function () {
window.onload = function () {
var mapDiv = document.getElementById('map');
var options = {
zoom: 3,
center: new google.maps.LatLng(37.09, -95.71),
mapTypeId: google.maps.MapTypeId.ROADMAP
};
var map = new google.maps.Map(mapDiv, options);
var cities = [];
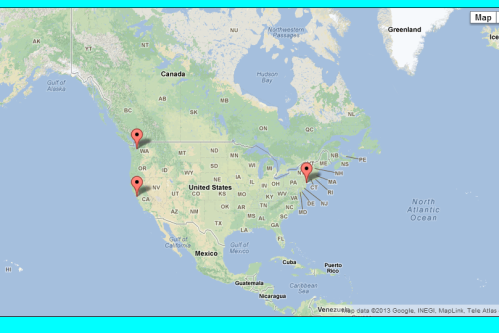
cities.push(new google.maps.LatLng(40.756, -73.986));
cities.push(new google.maps.LatLng(37.775, -122.419));
cities.push(new google.maps.LatLng(47.620, -122.347));
var infowindow;
for (var i = 0; i<cities.length; i++) {
//create markers for each city
var marker = new google.maps.Marker({
position: cities[i],
map: map,
title: "City Number " + i
});
(function (i, marker) {
//create even listeners (closures at work)
google.maps.event.addListener(marker, 'click', function () {
if (!infowindow) {
var infowindow = new google.maps.InfoWindow();
}
//set content
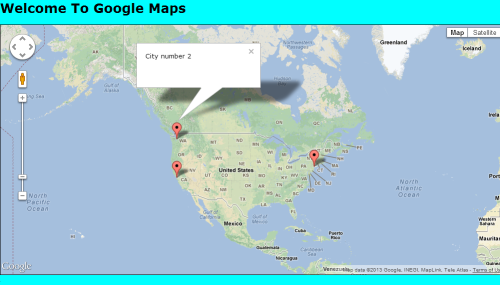
infowindow.setContent('City number ' + i);
//open the window
infowindow.open(map, marker);
});
})(i, marker);
}
};
})();
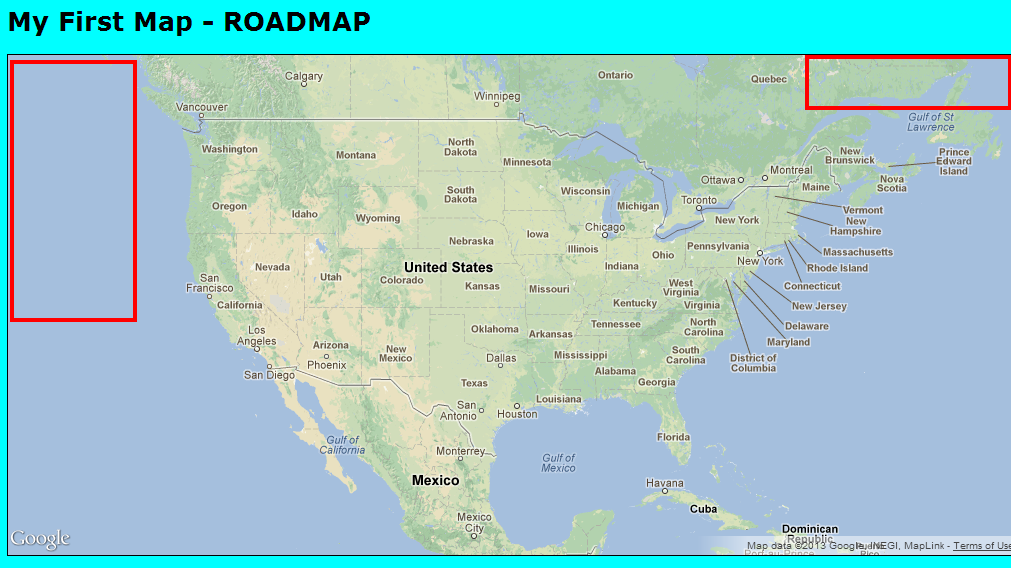
Three markers:
Clicking on any of the markers results in the following:
Everything up until line 11 should be second nature to you by now, I hope. Now, at line 12…15, I simply defined an array and added three cities to it.
On line 17 – I defined a variable infowindow which will come in handy when we want to avoid duplicating info windows by checking if one already exists.
On line 18…24 – I use a for loop to create markers and from
Line 26…37 – I used an anonymous function within the for loop to add event listeners to each of the markers. Everything within the anonymous function is much like what we have been doing all along – creating an info window, setting the content and finally opening it when a marker is clicked.
I am using closures here to avoid a situation where no matter which marker you click, the infowindow will open for the marker that was created last(always ‘infowindow number 3’). You can read more about closures by visiting Douglas Crockford’s Post .
I am going to stop here because I think this is long enough. I will do more fun stuff next time. If you notice any errors, please notify me and I will fix them as soon as possible. If you have any questions please let me know through the comments section. Hopefully this taught you something meaningful. Thank you for stopping by.